

TL;DR:
- Most broken chain repairs can be done at home with the right tools and guidance.
- However, chains like herringbone, snake, or hollow types require professional repair to avoid damage.
Most broken chain repairs can be done at home without setting foot in a shop. You need the right tools, a steady hand, and a clear understanding of what type of break you are dealing with. This guide covers how to get a broken chain repaired without visiting a shop, from gathering your kit to executing the lateral twist technique used by jewellers. It also tells you honestly when to put the pliers down and call in a professional. Because sometimes, the bravest thing you can do is admit defeat.
What tools do you need to fix a broken chain at home?
Good tools make the difference between a repair that holds and one that makes things worse. You do not need a jeweller’s workshop. You need a small, specific kit.
Here is what to gather before you start:
- Two pairs of fine-tipped pliers. Needle-nose and flat-nosed work best. You need two so you can hold both sides of a jump ring simultaneously.
- A magnifying glass or jeweller’s loupe. Chain links are tiny. Working without magnification is like trying to thread a needle in the dark.
- Replacement jump rings and clasps. Buy these in the correct metal type and gauge. Matching size and thickness is non-negotiable. Mismatched rings create weak points that snap again quickly.
- A soft cloth. Lay your chain on it to stop links rolling off the table and vanishing forever.
- Good lighting. A bright desk lamp or a daylight bulb. Shadows are your enemy here.
Pro Tip: Never use garage pliers or household adhesives on jewellery. Serrated pliers scratch and crush delicate metal. Superglue leaves permanent residue that makes future professional repairs significantly harder and more expensive.
| Tool | Purpose |
|---|---|
| Two fine-tipped pliers | Open and close jump rings without distortion |
| Jeweller’s loupe or magnifying glass | Inspect links and guide precise closures |
| Replacement jump rings | Replace broken or deformed links |
| Replacement clasp | Swap out failed lobster claw or spring ring |
| Soft cloth and bright lamp | Safe, clear working surface |
How to get a broken chain repaired without visiting a shop
Before you touch anything, inspect the break carefully. Identifying the exact problem saves you from fixing the wrong thing. Most home-repairable breaks fall into three categories: an open or snapped jump ring, a failed clasp, or a separated link.
Step 1: Identify the break
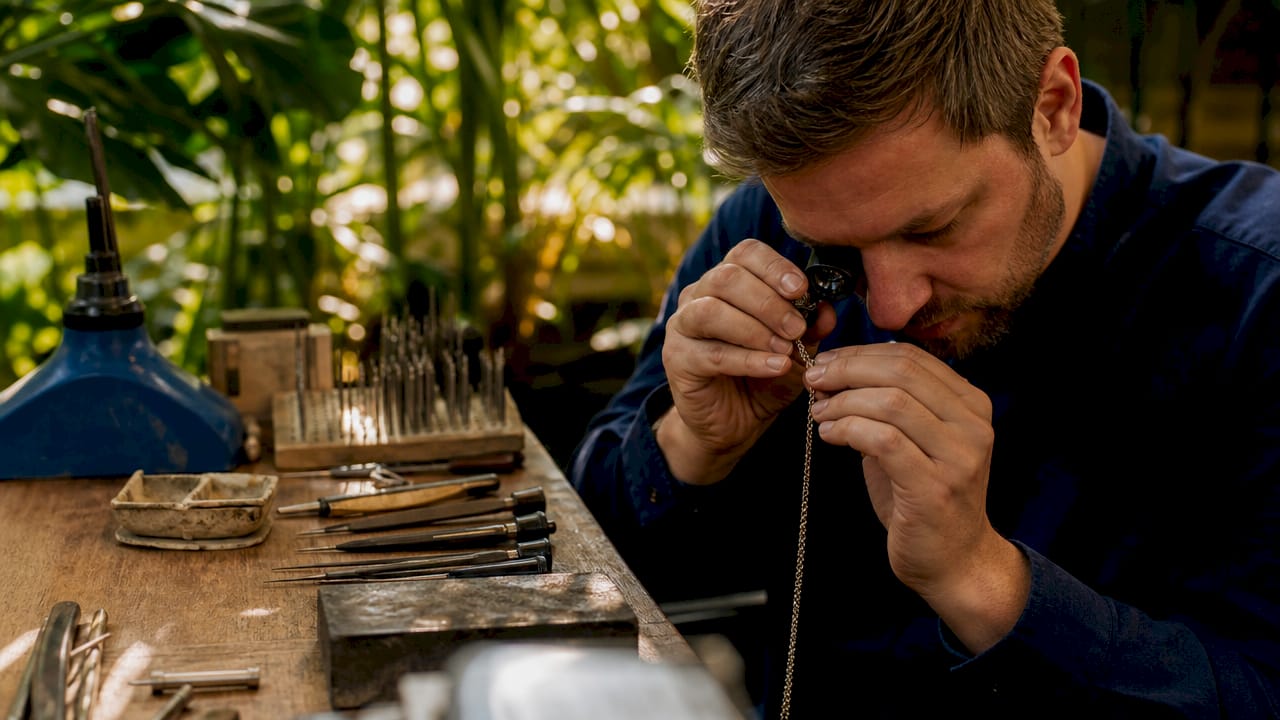
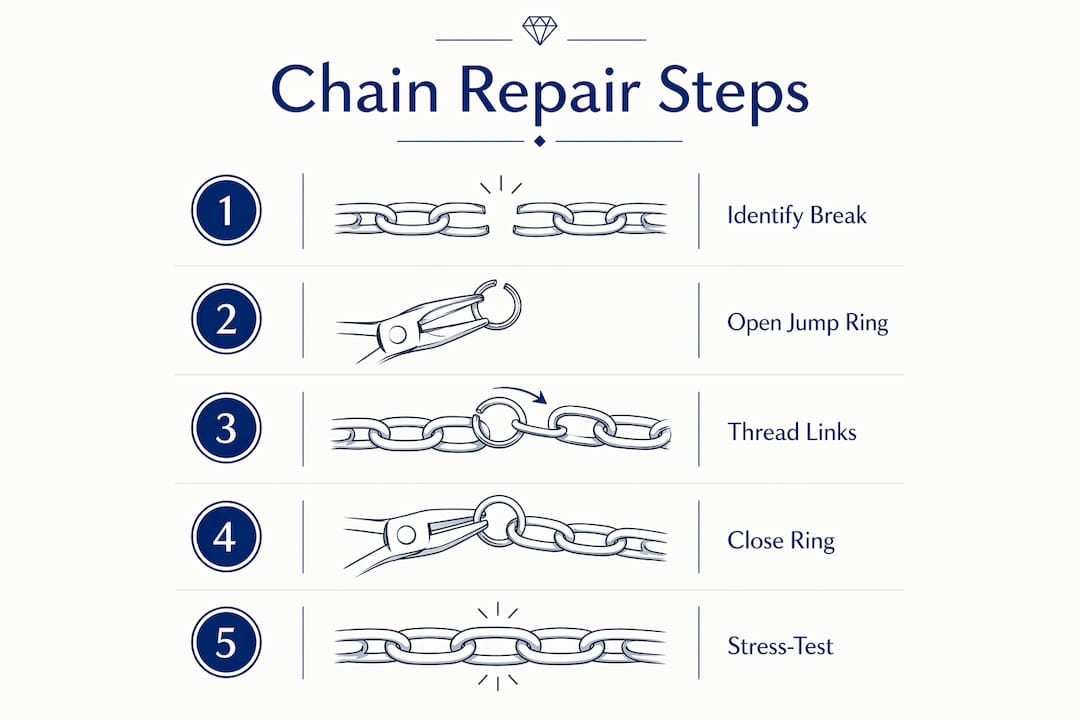
Hold the chain under your magnifying glass. Look for the specific point of failure. Is a jump ring open but intact? Is the clasp mechanism broken? Is a link bent or separated? Each problem has a different fix.
Step 2: Open the jump ring using the lateral twist technique
The lateral twist technique is the correct method for opening jump rings. Grip each side of the ring’s opening with a pair of pliers. Twist one side towards you and the other away. This opens the ring along its axis without distorting its circular shape. Never pull the two ends apart sideways. That creates an oval, weakened ring that will never close cleanly.
Step 3: Thread and close the ring
Slide the open jump ring through the chain links it needs to connect. Then reverse the twist to close it. The two ends of the ring must meet flush, with zero gap. Run your fingernail across the join. If you feel a ridge or gap, twist again until the closure is seamless.
Step 4: Replace a broken clasp
Standard clasps like lobster claws and spring rings are widely available from craft suppliers and online. Remove the old clasp by opening its attached jump ring using the lateral twist method. Attach the new clasp by threading the jump ring through the clasp loop and the chain end, then close it securely.
Step 5: Stress-test the repair
Give the repaired section a gentle tug in both directions. Not a yank. A firm, steady pull. If the join holds without shifting, you are done. If it moves or opens, close the ring more tightly before wearing the piece.
Pro Tip: Practice the lateral twist on cheap craft jump rings before working on your actual jewellery. Ten minutes of practice will save you from accidentally mangling a sentimental piece.
| Repair type | Recommended technique |
|---|---|
| Open jump ring | Lateral twist to close; no replacement needed |
| Snapped jump ring | Replace with matching gauge ring using lateral twist |
| Failed clasp | Remove via jump ring; attach new clasp of same type |
| Separated link | Realign and close with two pliers if undamaged |
For a more detailed walkthrough specific to gold chains, the step-by-step repair guide from Blackwelljewellers covers metal-specific considerations worth reading before you start.
When should you stop and call a professional jeweller?
Not every break is a DIY job. Knowing the limits of home repair protects your jewellery from permanent damage.
- Herringbone, snake, and hollow chains. These require professional repair because their structure cannot be manipulated with standard pliers without crushing or kinking the metal. One wrong move and the chain is unwearable.
- Plated chains with visible base metal. Home tools cannot restore plating. A professional can replate after repair.
- Breaks requiring soldering. Soldering at home without proper equipment and training risks burning the metal, introducing porosity, or weakening the surrounding links. Laser welding, used by professional jewellers, is far more precise and leaves no visible join.
- Multiple breaks or widespread fatigue. If your chain has snapped in more than one place, the metal itself is fatigued. Fixing one break leaves the others waiting to go.
Professional jewellers treat inspection as the most critical repair step. Hidden wear and fatigue along the full length of a chain causes recurring breaks if left undetected. A professional does not just fix the visible break. They assess the whole chain.
Professional chain repair typically costs between £15 and £50 for standard tasks like soldering and clasp replacement. That is genuinely good value when the alternative is destroying a piece you cannot replace.
Common DIY chain repair mistakes and how to avoid them
Even with the right tools, people make the same errors repeatedly. Here is what to watch out for.
- Pulling jump rings apart sideways. This deforms the ring permanently. Always use the front-to-back twist along the axis.
- Using household glue. Superglue on metal jewellery is a disaster. It leaves residue, fails structurally, and makes professional repair significantly harder. Do not do it.
- Leaving a small gap in the closure. A jump ring that is 90% closed is not closed. Fabric, hair, and other chain links catch in that gap and reopen it. Close it fully.
- Skipping the clean before repair. Dirt and oils on the metal prevent a clean closure and accelerate oxidation at the join. Wipe the chain with a soft cloth before starting.
- Attempting repairs on delicate chain types without experience. Snake and herringbone chains look simple but are structurally complex. If you are a beginner, practise on a basic cable or curb chain first.
Pro Tip: After completing any repair, clean the entire chain gently with a soft cloth to remove fingerprints and oils. This prevents oxidation building up at the newly worked join, which is the most vulnerable point on the chain.
The Blackwelljewellers guide on jewellery repair mistakes goes deeper on this topic if you want to avoid the most costly errors people make at home.
Key takeaways
Fixing a broken chain at home is achievable for simple breaks, but the lateral twist technique, matching replacement parts, and knowing when to stop are what separate a lasting repair from a repeat problem.
| Point | Details |
|---|---|
| Use the right pliers | Two fine-tipped pliers and the lateral twist technique prevent ring deformation. |
| Match your replacement parts | Jump rings must match the original gauge and metal type to avoid weak points. |
| Never use adhesives | Superglue fails structurally and leaves residue that complicates professional repair. |
| Know your chain type | Herringbone, snake, and hollow chains need professional repair, not home tools. |
| Inspect beyond the break | Hidden fatigue along the chain causes repeat breaks if not identified and addressed. |
James’s honest take on DIY chain repair
I will be straight with you. The first time I tried to fix a chain at home, I made every mistake in this article. I used the wrong pliers, pulled the jump ring sideways like I was trying to open a crisp packet, and ended up with a mangled oval of metal that was worse than useless. The chain went in a drawer and stayed there for six months.
The thing is, once I learned the lateral twist technique and got a proper loupe, it genuinely clicked. Simple cable and curb chain repairs became satisfying rather than stressful. There is real pleasure in fixing something yourself, and the cost saving compared to professional repair is not trivial.
My honest advice: start on a chain you do not care about. A cheap fashion piece from a market stall. Get the feel of the pliers, practise opening and closing jump rings until it feels natural, then move on to the piece you actually want to fix. Patience is the skill here, not strength.
And please, for the love of everything, do not reach for the superglue. I have seen what that does to a piece that later needed professional attention. It is not pretty, and the jeweller will not be impressed.
Know when to concede. A sentimental piece, a hollow gold chain, anything with laser-welded links. Hand it over to someone who does this every day. Your pride is not worth a permanently damaged necklace.
— James
When a professional repair is the right call
Sometimes the DIY route simply is not the right one, and that is perfectly fine.

Blackwelljewellers has been handling jewellery repairs for over 20 years across its Kent stores in Maidstone, Gravesend, and Bexleyheath, as well as nationally online. The team uses professional soldering and laser welding techniques for chain repairs that home tools cannot replicate. Pricing is transparent, workmanship is in-house, and the service covers everything from simple clasp replacements to complex structural rebuilds. For pieces that matter, whether pre-owned, sentimental, or simply too delicate for pliers, the professional repair service is worth every penny. You can also browse the second-hand jewellery collection if a replacement piece makes more sense than a repair.
FAQ
Can you fix a broken chain at home without special tools?
Basic repairs like closing an open jump ring are possible with two pairs of fine-tipped pliers and a magnifying glass. Without these minimum tools, you risk deforming the metal and worsening the break.
What is the lateral twist technique for jump rings?
The lateral twist involves gripping each side of a jump ring’s opening with pliers and twisting one side towards you while the other goes away. This opens and closes the ring along its axis without distorting its shape.
Which chain types cannot be repaired at home?
Herringbone, snake, and hollow chains require professional repair. Home tools crush or kink their structure, making damage worse rather than better.
Is superglue safe to use on a broken chain?
Superglue is not safe for jewellery repairs. It leaves permanent residue, fails under tension, and makes subsequent professional repairs harder and more costly.
How much does professional chain repair cost in the UK?
Professional chain repair typically costs between £15 and £50 for standard tasks like soldering and clasp replacement, depending on the metal type and complexity of the break.