

TL;DR:
- Most damaged rings can be fully restored with proper assessment and professional help.
- Routine inspections and gentle cleaning prevent costly repairs and preserve jewelry value.
- DIY fixes are limited to minor surface issues; significant damage requires expert repair.
A cherished ring that suddenly looks bent, scratched, or missing a stone can feel like a minor catastrophe. Whether it is a beloved antique inherited from a grandparent or a diamond engagement ring that has taken a knock, the instinct is to panic first and act second. But ring repair is rarely the disaster it appears to be in that first moment of distress. With the right assessment, the correct tools, and honest advice about when to call in a professional jeweller, most damaged rings can be fully restored and worn with complete confidence again.
Table of Contents
- Assessing ring damage: what to look for
- Essential tools and materials for ring repair
- Step-by-step guide: safe DIY fixes for common ring issues
- When to seek professional help for ring repair
- Verifying your repair: how to check your ring is safe and sound
- A jeweller’s perspective: why shortcuts can cost you more
- Need professional ring repair or bespoke advice?
- Frequently asked questions
Key Takeaways
| Point | Details |
|---|---|
| Identify ring issues early | Spotting and addressing damage promptly can prevent costlier repairs and loss. |
| Use proper tools and methods | Stick to specialist-approved cleaning and repair tools rather than risky home hacks. |
| Know your limits | Seek professional help for cracks, lost stones, or structural faults to maintain your ring’s value. |
| Regular inspections matter | Professional check-ups can cut jewellery losses by as much as 60 percent. |
Assessing ring damage: what to look for
Understanding your ring’s condition is the first step before attempting any repair.
Many people notice an obvious problem and immediately attempt a fix. That instinct is understandable, but it is frequently where small problems become larger ones. Before you do anything else, take a few minutes to carefully assess exactly what you are dealing with. Get a good light source and, ideally, a magnifying glass.
The most visible signs of ring damage include:
- A loose or wobbly stone that shifts when touched
- A band that is visibly bent or no longer circular
- Worn or thin prongs and claws that no longer grip a stone securely
- Deep scratches or dents in the band
- A missing stone, leaving an empty setting
- Discolouration or worn plating on gold or silver rings
What is far more dangerous are the problems you cannot immediately see. Hairline fractures in a band, weakened prongs that look intact but are paper-thin, and micro-cracks near a setting can all lead to catastrophic failure without much warning. These require a jeweller’s loupe (a small, high-magnification lens) to spot reliably. According to guidance on detecting ring problems, even seasoned collectors frequently miss these signs, which is exactly why routine inspection matters so much.
Continuing to wear a structurally compromised ring is one of the most common causes of stone loss. A single knock against a hard surface can dislodge a stone that was already barely held in place. Stop wearing the ring the moment you suspect damage.
The cost of ignoring early warning signs is real. Common jewellery care mistakes often compound damage that began as something very minor, and professional inspections can reduce jewellery loss by up to 60% when conducted regularly. A bent prong left unchecked for six months can go from a five-minute fix to a full re-setting job. That is a significant difference in both time and cost.
Essential tools and materials for ring repair
Once you recognise the damage, gathering the correct tools ensures you are set up for safe repairs.
Not every ring problem requires a workshop full of specialist equipment, but that does not mean any object lying around the house will do the job safely. For basic home care and very minor maintenance, you will need:
| Tool or material | Purpose | Safe for home use? |
|---|---|---|
| Soft-bristled brush | Removing dirt from settings | Yes |
| Lint-free cloth | Polishing and drying | Yes |
| Mild soap solution | General surface cleaning | Yes, with care |
| Jeweller’s loupe | Magnified inspection | Yes |
| Ring mandrel | Checking and reshaping bands | With caution |
| Stone tweezers | Handling loose stones | Only if experienced |
| Ultrasonic cleaner | Deep cleaning | Professional recommended |
For safe jewellery cleaning, warm water and a tiny drop of washing-up liquid applied with a soft brush is usually sufficient for gold and silver rings. Rinse thoroughly with clean water and dry immediately with a lint-free cloth. Simple and effective.
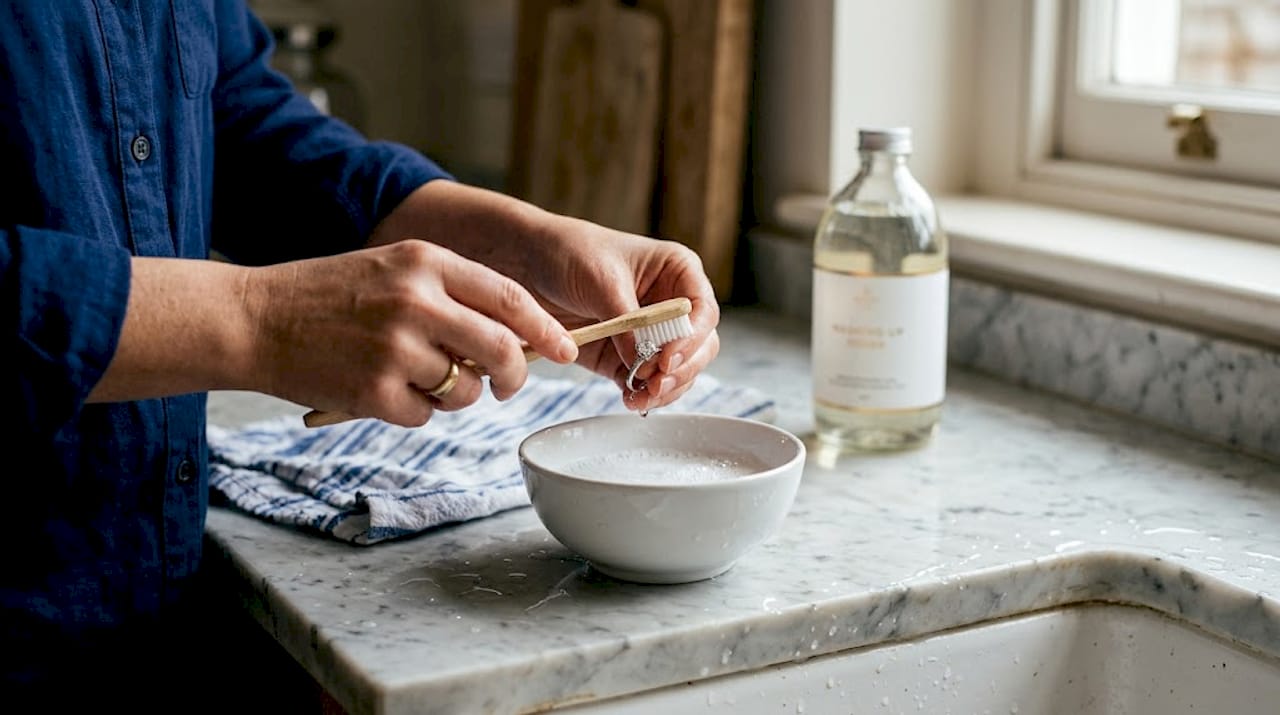
Where many people go wrong is reaching for something stronger than necessary. A popular trend on social media suggests soaking rings in vodka to make them sparkle. While alcohol does have some cleaning properties, it can degrade the adhesives used in some settings, dry out natural stones like opals and emeralds, and strip treatments from coated metals. For antique or pre-owned rings with older construction methods, this kind of hack can cause real harm.
Pro Tip: Never use bleach, toothpaste, or abrasive household cleaners on any ring. Toothpaste is mildly abrasive enough to scratch soft metals and can dull a polished surface permanently. Bleach can degrade gold alloys over time, causing brittleness and discolouration.
Professional ultrasonic and steam cleaning machines operate very differently from home tools. Ultrasonic cleaners use sound waves to loosen dirt at a microscopic level without physical contact, while steam cleaning uses pressurised hot steam to clear debris from even the most intricate settings. Both methods require skill to apply safely, particularly with antique rings where the metal may have pre-existing fractures that vibration could worsen.
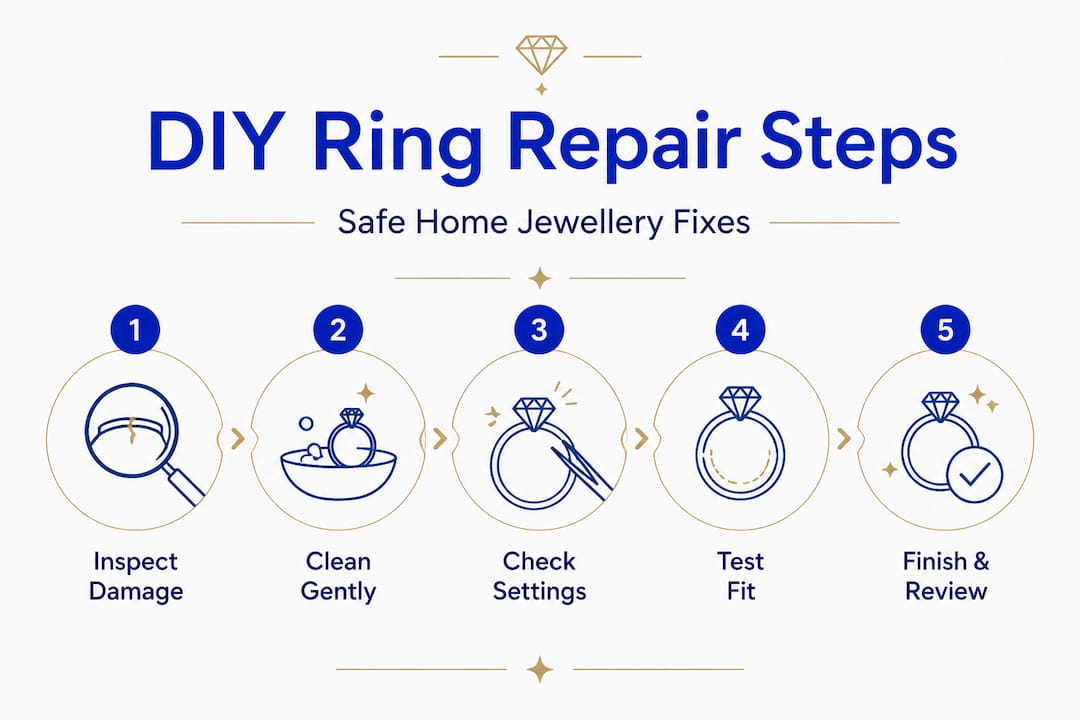
Step-by-step guide: safe DIY fixes for common ring issues
With the right tools ready, you can now tackle the simplest fixes confidently.
A key point of clarity here: genuinely safe DIY ring repair is limited to very minor surface issues. If you are dealing with anything structural, stop at step one and consult a professional. That said, these straightforward tasks can be done carefully at home.
-
Clean the ring first. Before assessing or touching any setting, clean the ring gently using a soft brush and mild soap solution. Rinse well and dry completely. Dirt trapped around a setting can make a stone appear loose when it is actually secure.
-
Inspect under magnification. Use a loupe or even a macro lens on a smartphone to examine every claw, prong, and section of the band. Look for cracks, thinning metal, or stones that have shifted position.
-
Test stone security carefully. Use the very tip of your fingernail to gently press against each stone. A secure stone should not move at all. Any wobble means the setting needs professional attention, not a DIY fix.
-
Reshape a very slightly bent band. If a soft silver ring has a very minor, barely perceptible bend, a ring mandrel (a tapered metal rod) can help. Place the ring over the mandrel and apply very gentle, even pressure with your fingers. Never use a hammer. This approach is only suitable for plain bands without stones.
-
Polish the surface. A lint-free jewellery cloth can restore a pleasing shine to light surface scratches on gold and silver. Work in small, circular motions and avoid heavy pressure.
-
Store securely. After your check, place the ring in a fabric-lined box away from other pieces. Metal-on-metal contact causes scratches and can dislodge stones further.
Pro Tip: Always inspect your ring under magnification before and after any maintenance. What looks fine to the naked eye may tell a completely different story under a loupe, particularly with older or antique pieces where metal fatigue can be invisible without magnification.
Our ring repair guide for the UK covers additional techniques that professional jewellers use in-store. Combining those insights with these care hacks for rings gives you a solid foundation for keeping your rings in excellent condition between professional visits.
When to seek professional help for ring repair
Not every repair should be tackled alone. Here is how to know when to call in a professional.
Some ring problems are simply beyond any home fix, and attempting them without the right equipment or training is likely to make things worse, sometimes irreversibly so. Knowing the dividing line is the most valuable piece of advice in this entire guide.
DIY is reasonable for:
- Basic cleaning and polishing
- Visual inspections for obvious damage
- Very gentle reshaping of plain soft metal bands
- Safe storage and routine care
A professional jeweller is essential for:
- Any crack or fracture in the band, no matter how small
- A snapped or broken shank (the lower section of the ring)
- Loose, shifted, or lost stones
- Worn or missing prongs and claws
- Re-plating of white gold or rhodium-coated pieces
- Soldering split or broken sections back together
| Problem type | DIY suitable? | Professional required? |
|---|---|---|
| Surface scratches | Yes | No (unless deep) |
| Loose stone | No | Yes |
| Bent band (plain) | With care | Recommended |
| Cracked band | No | Yes, urgently |
| Worn prongs | No | Yes |
| Missing stone | No | Yes |
| Tarnishing | Yes | No |
The case for professional intervention is stronger than many people realise. Jewellery loss can be reduced significantly through expert inspections, which catch the hidden problems that most wearers never see. In Kent, Blackwell Jewellers operates specialist repair services from stores in Maidstone, Gravesend, and Bexleyheath, offering in-house workmanship on both modern and antique pieces.
Understanding the most common jewellery repairs gives you a clearer picture of what to expect when you bring a ring in for assessment. Re-tipping claws, soldering broken shanks, and stone replacement are all routine services for experienced jewellers, even if they sound daunting. A professional consultation will explain the options, the costs, and the timeline clearly before any work begins.
In-store broken jewellery repair services cover the full range of damage types, from the relatively minor to the genuinely complex. Avoiding common mistakes that damage jewellery before and after repairs is equally important, as returning to bad habits can quickly undo careful restoration work.
Verifying your repair: how to check your ring is safe and sound
After any repair, whether DIY or professional, you must ensure everything is secure. That is how you protect your ring for years to come.
Verification is a step that too many people skip, assuming that because work has been done, everything must now be fine. Whether you have just returned from a professional jeweller or finished a careful home clean, taking a few minutes to confirm the ring’s condition is time well spent.
Follow these post-repair checks:
- Test the fit. The ring should slide over the knuckle with mild resistance and sit firmly on the finger. A ring that is too loose spins constantly, increasing the risk of stone contact with surfaces.
- Check every stone individually. Use your fingernail to press gently against each stone. Any movement at all means the setting requires further attention.
- Inspect under bright light. Hold the ring under a strong lamp or use a loupe. Check for solder residue, uneven finishes, or signs of remaining cracks.
- Assess the finish. Polished areas should be uniformly shiny. Matt finishes should be consistent. Any patches suggest incomplete work.
- Examine the prongs. Each prong should sit flush against the stone, with no gaps or lifting edges. Raised prongs catch on fabric and loosen further.
- Store correctly. Between wears, keep the ring in an individual fabric-lined compartment. Mixing pieces causes unnecessary surface contact and wear.
For ongoing post-repair maintenance, scheduling a professional check every six to twelve months is the single most effective thing you can do to prevent future damage. Understanding why rings break in the first place also helps you change habits that may be putting unnecessary strain on your jewellery.
A jeweller’s perspective: why shortcuts can cost you more
Having seen how to check your ring’s safety, it is worth hearing from those who see repairs every day.
In over two decades of working with pre-owned, antique, and modern jewellery, the pattern we see most often is this: a small, affordable fix was postponed, a shortcut was attempted, and what would have cost very little became an expensive restoration. Sometimes the damage is irreversible. A loose claw that is left for another few weeks eventually fails. The stone is gone. And with an antique ring, a replacement stone that matches in cut, colour, and proportion can be extremely difficult to source.
Emergency DIY fixes feel logical under pressure. You spot a wobbly stone before an event and try to push it back into place with a fingernail or a toothpick. In the short term, the stone might look stable. In reality, you may have shifted it further, or introduced pressure into a prong that was already failing. The risk of home cleaning hacks follows the same logic. Something that appears harmless, like a vodka soak or an abrasive polish, can strip surface treatments, degrade adhesives in older settings, or introduce moisture to stones that are particularly sensitive to it.
What genuinely surprises many customers is how affordable professional repair is compared to the cost of ignoring a problem. A claw re-tip is a quick, skilled task for an experienced jeweller. A full re-setting because the stone fell out and was lost is a very different conversation. The gap between those two outcomes is often just one timely professional visit.
For antique and pre-owned rings especially, specialist knowledge matters enormously. Older construction techniques, period-specific metals, and unusual settings all require a jeweller who understands historical context, not just modern repair methods. Shortcuts that work on a contemporary solitaire can destroy the character and value of an Edwardian cluster ring. Recognising mistakes that damage jewellery early and responding with expert advice rather than improvisation is always the stronger choice.
Need professional ring repair or bespoke advice?
If you are ready to move from guidance to expert help, Blackwell Jewellers in Kent can restore your ring to its very best.
At Blackwell Jewellers, our in-house team has spent more than 20 years handling everything from quick claw repairs to full structural restorations on antique and pre-owned pieces. We understand that a ring is rarely just metal and stone; it carries real personal significance. Our stores in Maidstone, Gravesend, and Bexleyheath offer walk-in consultations so you can get a professional assessment without delay.

Whether you need specialist jewellery repairs for a damaged ring, honest pre-owned jewellery advice before a purchase, or want to explore bespoke ring solutions tailored entirely to you, our team is ready to help. Every repair we carry out is done in-house, with full transparency on pricing and timescales. Speak to us before a small problem becomes a costly one.
Frequently asked questions
What is the most common ring damage seen by UK jewellers?
Loose stones, bent bands, and worn claws are among the most frequent problems reported for both modern and pre-owned rings, making routine inspection the best form of prevention.
Are vodka or home cleaning hacks safe for rings?
Some home cleaning hacks can damage stones or settings and are generally not recommended for fine or antique rings, where mild soap and warm water remain the safest approach.
How often should I have my ring inspected?
A professional inspection every 6 to 12 months can greatly reduce the risk of jewellery loss or larger, more expensive repairs down the line.
What if my ring loses a stone or cracks badly?
Any severe crack or lost stone should always be handled by a professional jeweller for the best long-term result, as amateur attempts at this level of repair frequently worsen the original damage.


