

TL;DR:
- Most gold chain breaks are caused by daily wear, stress, or weak links.
- DIY repairs involve opening jump rings and replacing clasps, but professional soldering offers lasting fixes.
- Regular maintenance and professional inspections can extend the life of your gold chain significantly.
That sinking feeling when you reach for your favourite gold chain and find it snapped is something most of us know well. Whether it’s a treasured pre-owned piece or a gift with real sentimental weight, a broken chain can feel like a small loss. The good news is that most breaks are entirely fixable, and knowing whether to reach for your tools or call a professional makes all the difference. This guide walks you through the common causes of chain breakage, the tools you need, practical repair steps, and how to care for your chain afterwards so it lasts for years to come.
Table of Contents
- Common causes of broken gold chains
- Essential tools and materials for gold chain repair
- Step-by-step repair instructions for common breaks
- How to verify your repair and care for your chain
- Why professional repairs often make the difference
- Expert gold chain repairs and bespoke jewellery services
- Frequently asked questions
Key Takeaways
| Point | Details |
|---|---|
| Know the causes | Most gold chain breaks are due to daily wear, snags, or poor clasps. |
| Right tools matter | Using proper tools and materials ensures a safe and lasting repair. |
| DIY with caution | Simple fixes are possible at home but complex repairs should be left to professionals. |
| Ongoing care is vital | Regular maintenance and checks can prevent most future breakages. |
| Professional help pays off | Expert jewellers restore both value and sentimental worth to your gold chains. |
Common causes of broken gold chains
Understanding how and why gold chains break sets a solid foundation for successful repairs. The most frequent culprit is simple daily wear. Chains endure constant movement, friction, and the occasional sharp tug, and over time, even well-made links can weaken. Physical stress and daily wear are leading causes of chain failure, which is why even a chain you’ve worn for years without incident can suddenly give way.
Gold purity plays a significant role too. Higher-carat gold, such as 18ct or 22ct, is softer and more malleable than 9ct gold, making it more vulnerable to stress fractures and bent links. Finer chains with delicate links, like box or Singapore styles, are particularly prone to kinking and snapping. Clasps are another weak point. A lobster clasp that’s been opened and closed thousands of times will eventually lose its spring tension, and a spring ring clasp can fatigue at the hinge.
Here are the most common jewellery repairs that stem from these causes:
- Snagged links pulled apart by catching on clothing or hair
- Worn or thinned links that have gradually lost metal through friction
- Faulty or weakened clasps that no longer close securely
- Split or cracked jump rings at the pendant attachment point
- Kinked sections on fine chains that eventually fracture
According to the types of chain breakages documented by gemologists, the design of a chain directly affects where and how it fails. Rope chains, for example, tend to unravel rather than snap cleanly, while curb chains usually break at a single link.
“Prevention is always cheaper than repair. Remove your chain before exercise, swimming, and sleep to dramatically reduce stress on the links.”
Simple habits make a real difference. Avoid sleeping in your chain, remove it before swimming in chlorinated water, and never tug it free if it snags. These small changes can extend the life of a gold chain by years.
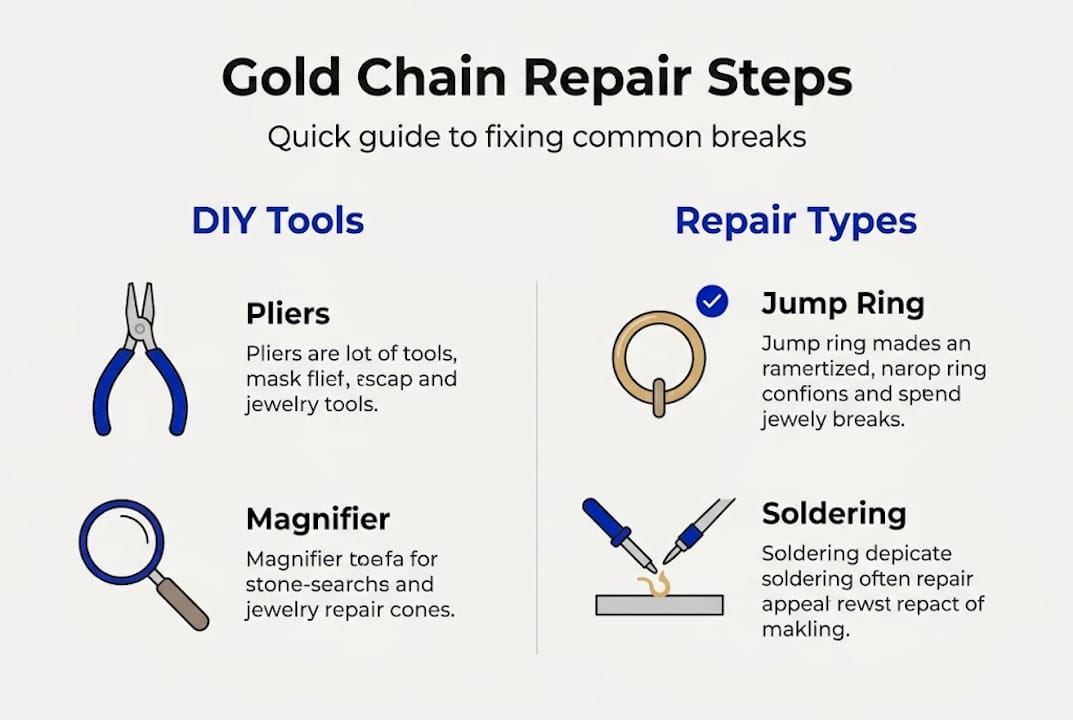
Essential tools and materials for gold chain repair
Once you understand the cause of your chain break, gathering the right tools and materials is the next crucial step. Having everything prepared before you start prevents mistakes and protects the gold from further damage.
| Tool or material | Purpose | DIY or professional |
|---|---|---|
| Jewellery pliers (flat-nose) | Opening and closing jump rings | DIY |
| Magnifying loupe or glass | Inspecting break points clearly | Both |
| Gold jump rings (matching carat) | Replacing broken or split rings | DIY |
| Replacement clasp | Fixing a failed clasp mechanism | DIY |
| Soldering kit with gold solder | Permanently fusing broken links | Professional |
| Soft lint-free cloth | Cleaning and handling the chain | Both |
| Jewellery cleaning solution | Prepping the chain before repair | Both |
For home repairs, the essentials are a pair of flat-nose pliers (two pairs is better), a magnifier, and gold jump rings that match the carat of your chain. Mixing gold purities is a common mistake that can cause discolouration and structural weakness. Always check the hallmark on your chain before buying replacement parts.

Soldering is a different matter entirely. It requires a torch, gold solder wire, flux, and a heat-resistant surface, plus the skill to apply heat without damaging surrounding links. Professional repair services have specific tools and expertise for safe results, particularly when the break involves a fine or high-carat chain.
Pro Tip: Before any repair, lay the chain on a white cloth under good lighting. This helps you spot every damaged link, not just the obvious break, so you don’t miss a weak spot that could fail again within days.
For cleaning, a mild solution of warm water and washing-up liquid works well. Pat dry thoroughly before attempting any repair. You can also read more about how to maintain gold jewellery to keep it in top condition between professional visits. For a fuller picture of what the repair process explained involves at a professional level, it’s worth reviewing what a jeweller actually does step by step. More detail on jewellery repair tools is also available for those who want to go deeper.
Step-by-step repair instructions for common breaks
With tools in hand, you’re ready to approach the actual repair with care. Here’s how to tackle the most common breaks safely.
Reattaching a jump ring or simple open link:
- Hold the chain steady on a soft cloth under magnification.
- Use two pairs of flat-nose pliers to grip either side of the open jump ring.
- Twist the ring open with a side-to-side motion, never pulling the ends apart, as this distorts the circle.
- Thread the broken chain ends onto the open ring.
- Twist the ring closed until the ends meet flush with no gap.
- Inspect the closure under magnification to confirm it is fully sealed.
Replacing a clasp:
Remove the old clasp by opening its connecting jump ring. Attach the new clasp using a fresh jump ring of matching carat. Close securely as above.
When a jeweller uses soldering:
For split links, thinned sections, or breaks on fine chains, a jeweller will clean the break, apply flux, and use a torch to flow gold solder into the joint. The result is a seamless, permanent bond that restores full tensile strength. This is not something to attempt at home without training. Some repairs are feasible at home, but professional repair ensures longevity for valuable or complex chains.
| Break type | DIY suitable? | Recommended approach |
|---|---|---|
| Open jump ring | Yes | Two-plier twist method |
| Broken clasp | Yes | Replace with matching clasp |
| Split or cracked link | No | Professional soldering |
| Multiple weak links | No | Full professional assessment |
| Fine chain fracture | No | Specialist jeweller only |
Pro Tip: Never use superglue on gold chains. It creates a brittle bond that shatters under tension and can contaminate the gold surface, making professional repair much harder afterwards.
To avoid repair mistakes that could worsen the damage, always know your limits. If in doubt about when to seek help, guidance on professional maintenance can help you decide. For a detailed walkthrough from a jeweller’s perspective, this expert step-by-step guide is a useful reference.
How to verify your repair and care for your chain
After a repair, ensuring the chain’s durability and maintaining its sparkle are essential for long-term wear. A rushed or incomplete repair can fail within days, so taking time to verify the result is just as important as the repair itself.
Post-repair verification checklist:
- Run your fingertip along the entire length of the chain to feel for rough edges or raised metal
- Inspect every link under magnification, not just the repaired section
- Test the clasp by opening and closing it ten times to confirm it holds
- Hold the chain up to light and look for any thinned or discoloured links
- Gently stretch the chain between two fingers to check for weak points
Once you’re satisfied with the repair, ongoing care is what keeps the chain in good condition. Gentle cleaning every few weeks with warm soapy water removes skin oils and product build-up that accelerate wear. Store your chain in a separate soft pouch or a lined jewellery box to prevent tangling and surface scratches. Tangled chains are a surprisingly common cause of link damage.
Pro Tip: Hang delicate chains on a small hook inside your jewellery box rather than coiling them. This prevents kinks from forming and makes it easier to spot any new damage early.
Regular checks and professional maintenance can cut chain losses by up to 60%, which is a compelling reason to book a professional inspection once a year even if nothing appears wrong. A jeweller can identify thinning links, loose clasps, and stress fractures long before they become a full break. For more practical gold chain care advice, there are excellent resources that cover everything from polishing to long-term storage. Staying consistent with care is far less costly than repeated repairs.
Why professional repairs often make the difference
There’s a tendency to assume that a simple-looking break means a simple fix. In our experience, that assumption is where things go wrong. We’ve seen chains come in for a second repair because a well-intentioned home attempt left a jump ring slightly open, or introduced a stress point that failed under normal wear within weeks.
For antique, pre-owned, or high-carat gold chains, the stakes are higher. Older chains often have non-standard link sizes, unusual alloys, or previous repairs that need to be assessed before any new work begins. Applying heat to a chain with an unknown repair history can cause existing solder to flow and damage surrounding links. Expert jewellers employ advanced techniques that preserve value and finish in ways that DIY simply cannot replicate.
The sentimental value of a chain matters too. A piece passed down through a family or bought from a trusted pre-owned collection deserves the care that only hands-on expertise can provide. The professional repair process is not just about fixing a break. It’s about protecting the integrity of something that carries real meaning.
Expert gold chain repairs and bespoke jewellery services
Ready for a flawless result or looking to breathe new life into a treasured piece? Our team at Blackwell Jewellers has been restoring and repairing gold chains for over 20 years, with in-house expertise across our Kent stores in Maidstone, Gravesend and Bexleyheath.

Our jewellery repair services cover everything from simple clasp replacements to complex soldering on fine and antique chains, with every repair carried out by skilled jewellers who understand the value of what you’ve entrusted to them. If you’re inspired to create something new, our bespoke jewellery design service lets you bring your vision to life. Or explore our carefully authenticated pre-owned jewellery collection for beautifully restored gold chains at exceptional value. Get in touch today for a consultation.
Frequently asked questions
Can I repair a broken gold chain at home?
You can repair simple breaks at home with the right tools, but for sentimental, intricate or valuable chains, professional repair is strongly recommended to ensure a lasting result.
How much does it cost to repair a gold chain in the UK?
Repair costs vary by chain type and damage, but standard fixes typically range from £20 to £100 depending on complexity and gold purity.
How can I prevent my gold chain from breaking again?
Avoid snagging, store chains properly, and schedule regular professional check-ups. Professional checks can cut chain losses by up to 60%.
Is it worth repairing pre-owned or second-hand gold chains?
Absolutely. Expert repair restores value and appearance in pre-owned pieces, making them just as wearable and beautiful as when they were first made.
Recommended
- Why Jewellery Breaks (and How to Stop It Happening Again) – blackwellonline
- Common Jewellery Repair Mistakes (and How to Avoid Them) – blackwellonline
- The Top 10 Most Common Jewellery Repairs — And What They Mean for Your – blackwellonline
- Can Broken Jewellery Be Fixed? In-Store Repair Services at Blackwell J – blackwellonline


